How to make sugar scrub for lips
![]() by Sarah Johnson March 11, 2024
by Sarah Johnson March 11, 2024
Taking care of your lips is just as important as any other aspect of personal hygiene and beauty routines. A homemade sugar scrub can help remove dead skin cells, promote smooth, soft lips, and ensure that they are well-primed for other products like balms and lipsticks. The main topic of this article is to show you how to craft an all-natural, effective sugar scrub for your lip care regimen.
Understanding Sugar Scrubs
What are Sugar Scrubs?
Sugar scrubs are a type of exfoliant particularly well-suited for sensitive skin areas like the lips. Made from granulated particles that slough away dead surface cells, these scrubs are not only simple to make but also very effective. They can be customized to suit various hair types, with modifications in ingredients to cater to the specific needs of your skin.
Why Sugar is Beneficial
Sugar is a natural humectant, meaning it draws moisture from the environment into the skin. When used on the lips, it can help maintain proper hydration levels, which is particularly beneficial for those who have dry or chapped lips. Moreover, sugar’s granular texture makes it perfect for gently exfoliating without causing irritation. Applying a sugar scrub could also infuse your lips with the vital moisture they’ve been craving, especially if they have been subject to harsh weather conditions or if you have not been properly washing and taking care of them.

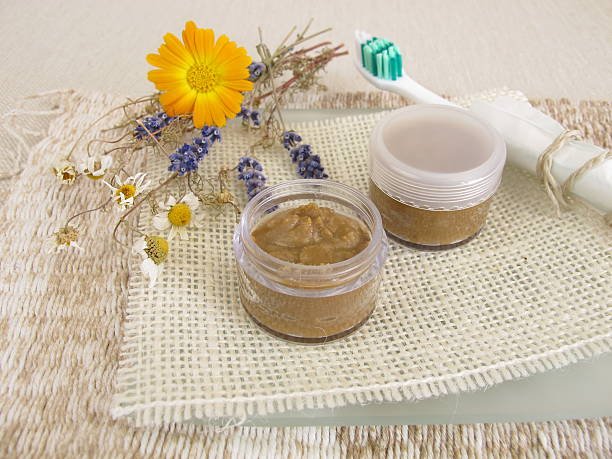
DIY Sugar Scrub for Lips
Essential Ingredients for Your Lip Scrub
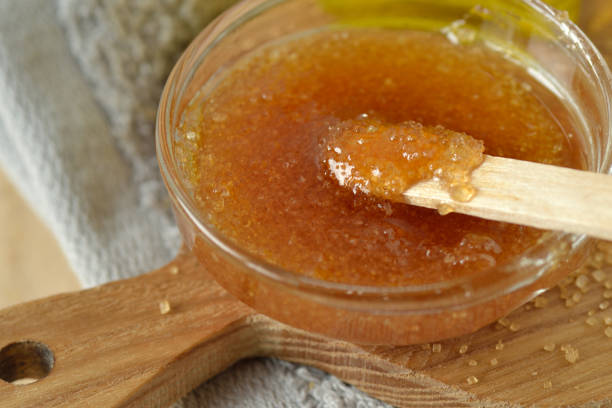
Creating a sugar scrub is simple, and you need just a few essential ingredients. Many of these ingredients might already be in your pantry or bathroom cabinet:
- Sugar – The primary exfoliant.
- Oil – To moisturize and bind the sugar together.
- Flavoring – Optional, for a pleasant scent and taste.
- Honey – For additional moisture and antibacterial properties.
These elements not only ensure that your lips are exfoliated but also provide nourishment and care afterward. It’s crucial to note that if you have oily skin or an oily scalp, choosing the right oil for your scrub is essential, as some oils are heavier and might not be as beneficial for you.
Choosing the Right Sugar for Your Scrub
Different types of sugar offer varying levels of exfoliation. For a gentler scrub, fine granulated sugar is ideal and will help prevent any harsh abrasion on your delicate lip skin. In contrast, those who have oily scalps or skin and might benefit from a stronger scrub can opt for turbinado sugar, which has larger crystals for a deeper clean. The key is to strike a balance that will effectively exfoliate without causing micro-tears or irritation.
Selecting Nourishing Oils
The type of oil you use in your scrub can heavily influence the end result. For example, coconut oil is renowned for its hydrating properties and could also help you if you’re looking for something to have longer-lasting effects post-scrub. However, if you have oily tendencies, lighter oils such as jojoba or grapeseed might be more appropriate as they can help balance out natural oil production without adding extra weight.
Step-by-Step Guide to Making Your Sugar Scrub
Preparing Your Workspace
Before you begin the mixing process, it is essential to ensure that your workspace is clean and that you’re ready to go by properly washing your hands and any tools or containers you will be using. This will help prevent any unwanted bacteria from contaminating your scrub.
Mixing Your Ingredients
Now, it’s time to mix your ingredients together. Start by taking a clean bowl and measuring out your sugar. Then, add in your chosen oil, mixing slowly until you reach a consistency that holds together but isn’t overly saturated.
| Ingredients | Amount |
|---|---|
| Sugar | 1/2 cup |
| Oil | 1/4 cup |
| Honey | 1 tablespoon |
| Flavoring | 1/2 teaspoon |
While mixing, remember that this scrub doesn’t require perfect precision—it’s forgiving and can be adjusted to preference. However, avoiding the use of too much of any liquid is key, as an overly moist scrub will dissolve the sugar crystals, which are the primary exfoliating agents.
Consistency and Storage
Once you’ve mixed your ingredients to the right consistency, it’s time to consider storage. An ideal storage container will be airtight to keep your scrub fresh and prevent any moisture from sneaking in. Small glass jars or cosmetic pots are great options. Here’s a simple guideline for achieving the perfect texture:
- Your scrub should hold together when pressed, but it should not be dripping with oil.
- Slight separation over time is normal; just stir before using.
Store your sugar scrub in a cool, dry place, and remember to label it with the date made. Although homemade sugar scrubs don’t contain preservatives and hence have a shorter shelf life than store-bought care products, proper storage will help extend their usability. It’s recommended to use the scrub within a month for maximum freshness and effectiveness.
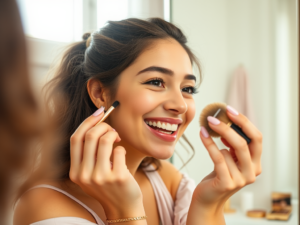
How to Properly Use a Lip Scrub
When it comes to applying your lip scrub, there’s a method that will help you achieve the best results:
- Apply a small amount of the sugar scrub to your lips.
- Use your fingertip to gently massage the scrub in a circular motion, allowing the sugar to gently exfoliate any dead or flaking skin away.
- After about a minute, or once you feel that your lips have been adequately exfoliated, rinse the scrub off with warm water, ensuring that you’re rinsing thoroughly.
Using your newly made scrub twice a week should be more than enough to maintain soft, smooth lips. However, remember that overuse might not be beneficial and could lead to irritation, especially if you have sensitive skin.
Post-Scrub Care
After you have rinsed off the scrub, your lips will be in their most receptive state for moisture. Immediately applying a good quality lip balm will help to lock in hydration. When selecting a balm, look for ingredients like shea butter or vitamin E, which offer long-lasting moisture and protection.
Additionally, avoid using long-wear lipsticks immediately after exfoliating, as these could potentially dry out your lips. Instead, opt for a lip care product that provides both tint and hydration if you’re looking to add some color.
Conclusion
Creating your own sugar scrub is a simple yet immensely rewarding practice that can greatly enhance your lip care routine. By using all-natural ingredients, you ensure that your lips are not only exfoliated but also nourished without the addition of harsh chemicals. Now that you know how to make, apply, and properly store your homemade sugar scrub, you’re well on your way to having healthier, softer lips. We encourage you to give this easy DIY a try and experience the benefits for yourself!
FAQs
Q1: How often should I use a lip scrub?
A1: It’s best to use a lip scrub about twice a week. Over-exfoliating can irritate your lips, so if you experience any discomfort, reduce the frequency.
Q2: Can sugar scrubs be used on other parts of the body?
A2: Absolutely! Sugar scrubs can be used on the face, hands, and body. Just adjust the coarseness of the sugar and the other ingredients according to the sensitivity of the skin in different areas.
Q3: I have oily skin; will a sugar scrub make my skin more oily?
A3: Not necessarily. If you have oily skin, opt for a lighter oil like jojoba or grapeseed in your scrub. These oils are less likely to clog pores and can help to balance natural oil production.
Q4: How long can I keep my homemade lip scrub?
A4: Homemade lip scrubs should be used within a month since they are preservative-free. Always store your scrub in an airtight container and in a cool, dry place to prolong its freshness.
Q5: Is it necessary to apply a lip balm after using the scrub?
A5: Yes, applying conditioner in the form of a lip balm after using a scrub is important. It helps to lock in moisture and protects freshly exfoliated skin.